A common task is sorting through a bunch of digital photos, working out which
ones to keep, which ones to upload, which ones to print, etc. The Image Marking
feature in the standalone viewer can make this process very simple. Images
you mark are automatically added to a file collection, from which you can then
copy, delete, upload, etc. the images you've chosen. Additionally, thumbnails of
the images you’ve marked are shown in a separate panel in the viewer, and there
are commands that make it easy to move around the marked images.
To mark the current image in the viewer, simply push the M key (or
click the Mark button on the toolbar). With the default configuration, a
file collection will automatically be created based on the name of the image’s
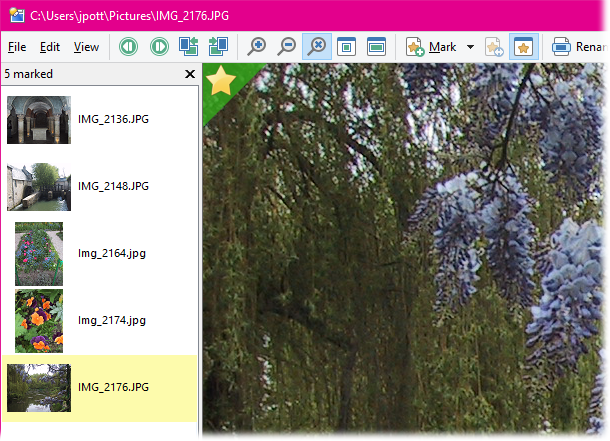
parent folder. On the left of the viewer window the marked image pane opens
automatically, showing thumbnails of the images you’ve marked. When this opens
it automatically checks the collection for any images you may have already
marked in a previous session.
If the current image you’re viewing is marked this is indicated with a star icon in the top-left corner, as shown in the above screenshot.
You can jump around the marked images by double-clicking their thumbnail. The marked image pane also lets you rename images by selecting their icon and pressing F2. The following keys relating to marking are also defined by default in the viewer:
M / Insert: Mark / unmark the current image
Ctrl + M: Show or hide the marked image pane
Ctrl + Left: Jump to previously marked image
Ctrl + Right: Jump to next marked image
Ctrl + Up: Jump to first marked image
Ctrl + Down: Jump to last marked image
Ctrl + Space: Return from jump to last viewed image
Shift + M: Exchange mark with previously marked image
These keys make it very easy to jump back and forth between images you’ve
marked and your current “position” in the list of images. The Exchange
mark command comes in handy when you’ve got multiple photos of the same
scene and you’re trying to decide which is the best. You might have marked the
first photo because you thought it was ok, but then two or three photos later
you find one that’s slightly better – simply press Shift + M to unmark
the previous one and mark the new one instead.
If you want to take a break from your session you can simply close the viewer
and come back to it later – all images that you’ve marked will be saved in the
file collection. When you’ve marked one or more images and you close the viewer,
Opus will automatically display the file collection for you in a new tab – you
can change this behaviour in Preferences.
The name of the file collection can be configured on the Viewer / Behavior page in Preferences. When you configure the collection name, you can use the special code %F to insert the name of the parent folder, and %D to insert the current date. You can also have Opus ask you for a collection name before each marking session.